The sizes at which SizeIM exports images are determined by one or more profiles which are attached to your project. Profiles are set up in the My Profiles area, accessed by clicking on My Profiles on the main SizeIM menu.
If you haven’t created any profiles previously, you will see an empty profile. Click on the ‘+’ icon towards the top of your screen to begin creating a new profile. You will first be prompted to give your profile a name.
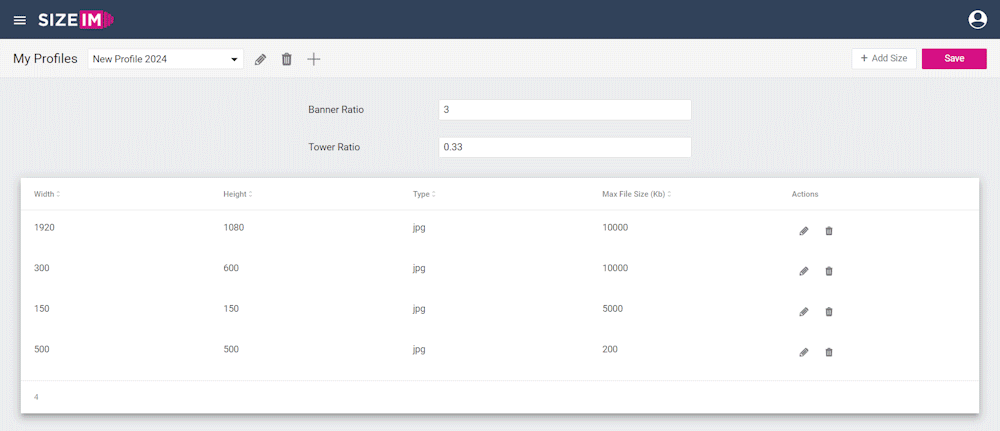
Once your profile has been named, you will be brought back to the My Profiles screen, with your new profile selected in the dropdown menu, and an empty list of sizes.
You will also see two fields labelled ‘Banner Ratio’ and ‘Tower Ratio’. The values in these fields define a threshold for determining if a particular set of dimensions should be considered a square, tower or banner. These thresholds will be used to aid SizeIM when generating sizes from your master size.
For example, the default values of 3 and 0.33 indicate that if a size is at least 3 times wider than it is high, it is to be treated as a banner. Similarly, if a size is at least 3 times higher than it is wide, it will be treated as a tower.
Any sizes that fall between these ratios will be considered to be a square by the application.
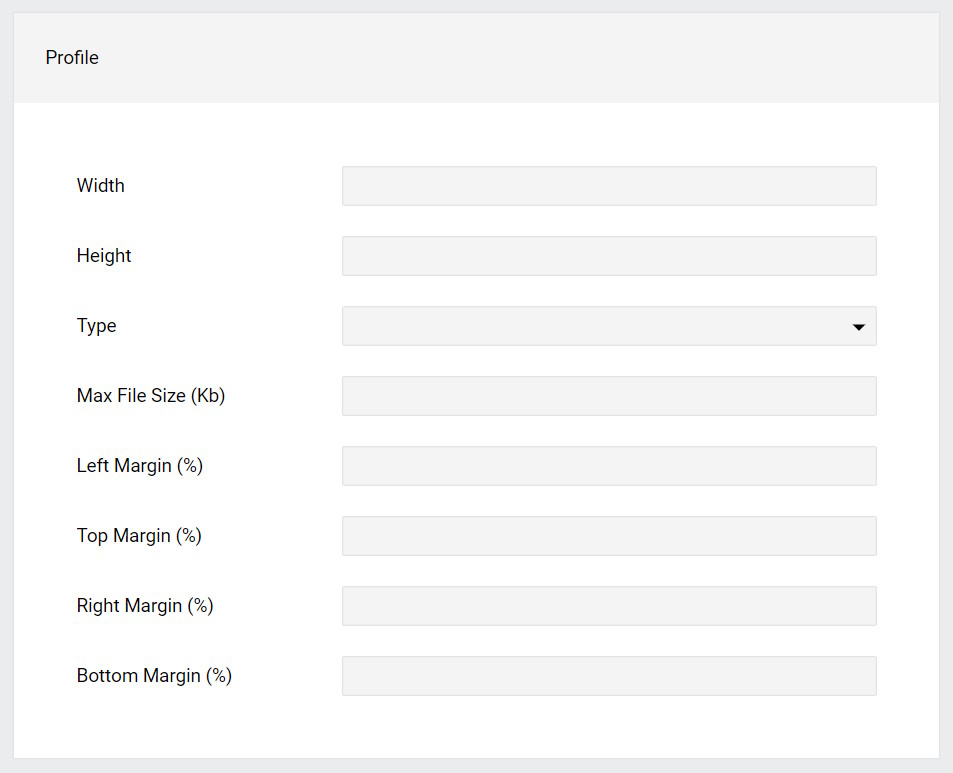
With your tower and banner ratios set up, it’s time to begin adding sizes to your profile. Begin by clicking ‘Add Size’ immediately under the main SizeIM toolbar. When defining a size, you will need to enter the desired width and height, output filetype and a maximum file size. You will also be prompted to enter percentage values for margins. SizeIM will add guides to the image size on the canvas so you can easily keep your important content within the margins.
After clicking ‘Save’, you can proceed to add further sizes to your profile. Once you have finished setting up your profile, it’s time to create your first project.